🚀FCT Builder
Overview
The library contains several key classes and interfaces that work together to build a graph representing a transaction flow:
FCTGraph: Core class representing the graph structure.WrappedPlugin: Represents a wrapped instance of a plugin within the graph.Param: Class representing a parameter of a plugin instance.
Usage
1. Create a new graph instance
To start, create a new graph instance using the create() function:
2. Add nodes to the graph
Add nodes to the graph using the add() method.
Visualization
3. Connect nodes and set the start node
Use the then(), onFail(), and onEither() methods to connect nodes and define the flow of the graph. Set the starting node using startWith():
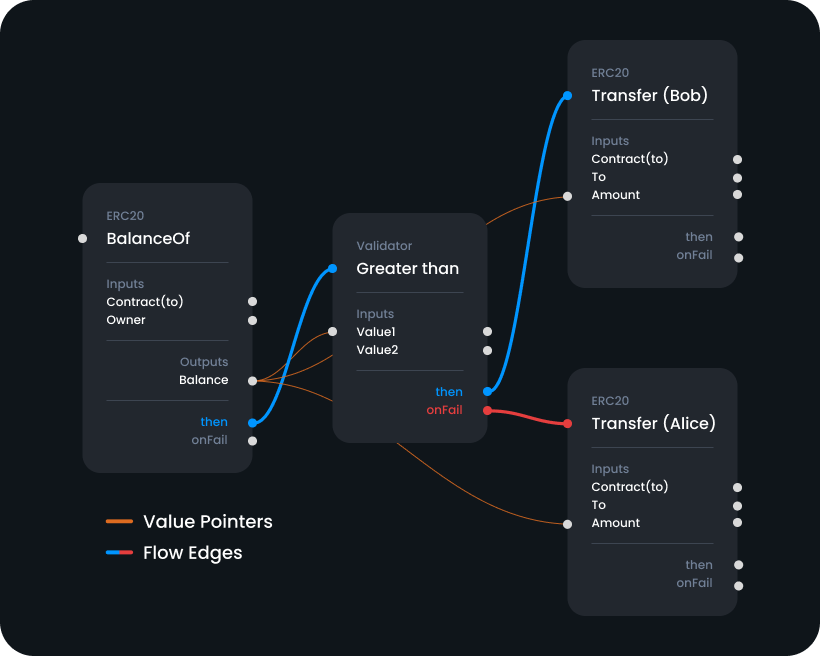
Note that each plugin has its own then, onFail, and onEither methods, which allow you to chain and connect plugins in a more modular way. For example:
In this example, we first connect getMyKiroBalance to isGreaterThen1000, then separately connect isGreaterThen1000 to sendAllKiroToBob and sendAllKiroToAlice based on the validation result. Finally, we set getMyKiroBalance as the starting node using fct.startWith().
Visualization
It's crucial to maintain the correct order of execution in this code, as the output of getMyKiroBalance is used as input for subsequent nodes. Changing the order may lead to incorrect or unexpected results. Always ensure the proper sequence when using outputs from one node as inputs for others.
4. Compile the graph
Finally, compile the graph to generate a transaction object:
🎉 Congrats on successfully creating your FCT! Now you can proceed with executing the transaction or using it in your application as needed.
Last updated